My wife and I had a new garage door installed three years ago. We'd gotten the quote, picked the door, scheduled the date. The crew showed up at 8 AM - two guys, one truck, a surprisingly small amount of tools visible from where I was standing. I had no specific plan for the morning other than being available if they needed anything.
What followed was four and a half hours of work I mostly didn't understand in real time but found genuinely interesting to watch in pieces. The old door came down faster than I expected. The new panels went up slower than I expected. And the spring tensioning - which I watched from about eight feet away at the installer's quiet suggestion - was nothing dramatic at all, just a deliberate, quiet mechanical process that I'd somehow imagined as more precarious.
Here's what the garage door installation process actually looks like from start to finish, so you're not standing in your driveway wondering what's happening or why it's taking as long as it is.
Before the crew arrives: what you're responsible for
Garage door installation preparation on your end is straightforward but makes a real difference in how smoothly things go.
Clear the garage. Not "clear enough to walk through" - clear. Everything in the work zone, which is the full width of the door plus several feet back, needs to be moved. Bikes, storage bins, tools, furniture, the lawn equipment. The crew needs to lay panels on the floor during assembly, move along the full track length, and access the ceiling mounting points without working around your belongings. Cluttered garages add time. This is consistent across every installation.
Check the electrical outlet. The opener motor mounts to the ceiling near the front of the garage and plugs into a standard 120V outlet. If there's no functioning outlet in that area, that's something to address before the crew arrives. An extension cord isn't a solution - the opener needs a dedicated outlet nearby. If you're not sure whether you have one, check before the day.
Move the cars out. This one's obvious but needs to be said - the entire garage needs to be empty of vehicles.
Have your contact information accessible and plan to be reachable. If the crew finds frame damage, track incompatibility, or anything that changes the scope of the job, they need to reach you for a decision. An installer waiting for a callback is an installer whose time you're paying for.
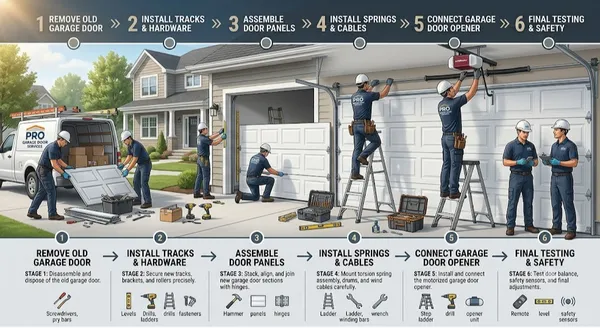
Step 1: Assessment and old door removal
The first thing the crew does when they arrive is look at what they're dealing with. The site assessment you received during the quote was based on measurements and visible inspection. What comes off the wall during removal sometimes adds information - frame condition behind trim, condition of the header bracket hardware, whether the existing spring system is in usable shape or needs to come out.
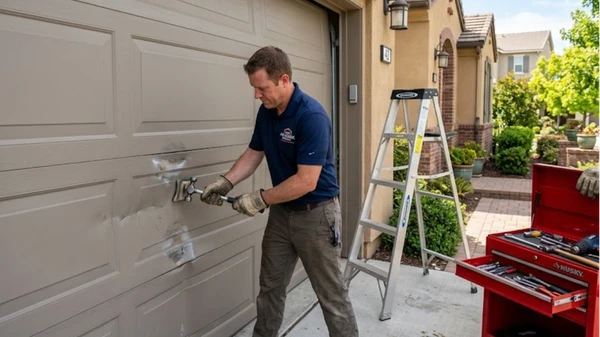
For a garage door replacement, old door removal is the first substantial task. The opener gets disconnected first - the power cord unplugged, the trolley carriage disconnected from the door. This takes a few minutes and ensures the door can't activate during the rest of the process.
The spring tension is released before any disassembly begins. This is not a quick step. For a torsion spring system, releasing tension requires inserting winding bars into the winding cones and deliberately unwinding the spring - a controlled process that requires the right tools and the right sequence. On a door that's been running for ten years, corroded winding cones and worn hardware slow this down further. Rushing spring tension release is how injuries happen; the crew won't rush it.
With tension released, the hardware comes down - cables disconnected from their drums, the torsion bar and spring assembly lowered from its mounting brackets, the trolley carriage removed from the opener rail. The panels come off next, from the top section down, each section disconnected from the hinges and lifted clear. Track sections come off the wall. The header bracket comes down.
For an average 16-foot double door that's been in service for a decade, this removal process takes 45 minutes to an hour and a half. A door in poor condition with rusted hardware and stripped fasteners takes longer.
Step 2: Frame inspection and opening preparation
Once the old door is out of the way, the frame gets looked at directly. The crew checks the wood at the track mounting positions, the header for any movement or soft spots, and the side jambs where the weatherstripping seats. If this inspection reveals anything that wasn't visible during the original quote, this is the moment it gets addressed - or the moment you get a call explaining what they found and what it changes.
The opening itself gets cleaned up. Old caulk, dried adhesive from weatherstripping, any surface material that the new hardware will mount over - this gets cleared so the new tracks and hardware seat against solid, flat surfaces. Track alignment depends on the mounting surfaces being true; anything lumpy or uneven under a mounting bracket affects how the door runs.
Step 3: Panel assembly and installation
New panels don't come as one piece. They arrive as individual horizontal sections that get assembled on the garage floor before being lifted into position.
The bottom panel goes in first. It's positioned in the opening, leveled with a level, and the bottom brackets are installed - the brackets that hold the bottom rollers and anchor the lift cables. This is the foundational section; if it's off, everything above it is off. The crew takes their time here.
The remaining panels stack upward, one at a time. Each section gets connected to the one below it with hinges, and the rollers on each side get seated into the vertical track as the section goes up. The panels are heavy - a single section of an insulated double-car door might weigh 40 to 60 pounds - and the crew is managing both accurate alignment and the physical work of moving that weight at ceiling height by the time the top section goes in.
If the door has windows, each panel with window cutouts gets handled more carefully - the glass is already in the panels, and the inserts have to be oriented correctly and secured. Window hardware gets installed after the panel is in position.
This phase of professional garage door installation typically takes 60 to 90 minutes for a standard sectional door, longer for heavier or more complex doors.
Step 4: Spring installation and tensioning
This is the part of the installation that most homeowners haven't seen and have the most questions about.
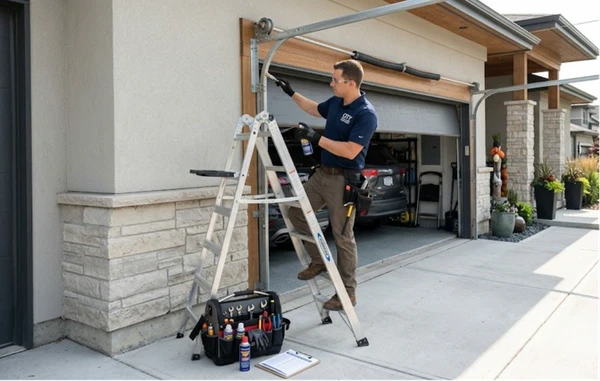
The torsion spring - a steel coil anywhere from 2 to 4 inches in diameter and 18 to 36 inches long depending on the door spec - mounts on a steel shaft above the door opening. The shaft runs between two bearing plates bolted to the header, with cable drums at each end that the lift cables wrap around.
The spring gets wound to a specific tension calculated from the door's weight and lift height. Too little tension and the door is heavy; the opener works against its actual weight rather than the balanced weight the spring is supposed to provide. Too much tension and the door shoots upward and strains the opener holding it down. The garage door spring tensioning process involves winding the spring with winding bars in quarter-turn increments, counting turns, and verifying balance when the target tension is reached.
Balance is verified by disconnecting the opener (or with it already disconnected) and manually lifting the door to about waist height. A properly balanced door stays in position when you let go - it may drift slightly but shouldn't fall or rise on its own. If it falls, more spring tension. If it rises, less. The adjustment happens in small increments until the door holds its position.
This step takes 20 to 40 minutes on a standard job. Longer on older spring hardware or if the door's weight puts it at the edge of the standard spring's range and the crew has to make judgment calls about tension.
Step 5: Opener installation
If a new opener is part of the job, it goes in after the door is hung and the springs are set. The sequence is deliberate - the opener needs the door to be correctly balanced before it can be properly calibrated.
The opener rail mounts to the ceiling framing using lag bolts into ceiling joists - the crew finds the joists first, the same way you'd find them for hanging a ceiling fan. The motor unit mounts at the back, the front mount bracket at the header. The trolley carriage clips onto the rail, and the J-arm connects the trolley to the door's top section operator bracket.
The wall button wires and safety sensor wires run along the wall and ceiling to their respective mounting points. Sensors go at floor level, 4 to 6 inches up, on each side of the door. The wall button goes at a position you can reach from inside the garage without being in the door's path.
Programming remotes and keypads, setting force limits, verifying auto-reverse - this is the final sequence before the opener is operational. Smart openers with Wi-Fi connectivity add a setup step that involves joining the home network and configuring the app. This takes 15 to 30 minutes and is sensitive to slow Wi-Fi or network issues in the garage area.
New garage door opener installation adds 1 to 2 hours to the total job time.
Step 6: Safety testing and walkthrough
Before the crew packs up, the door gets tested - multiple times, in both directions, with the opener and manually. The garage door safety sensor test is a specific check: a cardboard box rolled into the beam path while the door is closing should trigger an immediate stop and reversal. If it doesn't, the sensors need adjustment. They don't leave until this test passes.
The pressure reversal gets checked separately. Placing a 2x4 flat on the floor in the door's path and running the door down - the door should contact the board and reverse rather than grinding down against it. This test confirms the opener's force settings are calibrated appropriately for the door's balanced weight.
You'll get a walkthrough of how to operate the door, use the remotes and keypad, operate the emergency release, and what basic maintenance looks like. A quality installer hands you this information clearly. Take notes if anything isn't obvious - the emergency release procedure in particular is worth knowing before you need it under pressure.
The crew hauls away the old door and hardware. The work area gets cleared of packaging and any debris from the installation. You're left with a running door, documented warranties, and the installer's contact information for any issues that come up in the first few weeks.
The thing that most homeowners notice afterward
The door sounds different. Quieter than expected, or noisier in a specific location that didn't squeak before. Either way, the difference from the old door is usually striking - and if it's noisier in one spot, tell the installer before they leave rather than deciding to live with it. Most operational sounds during the first few days are seating-in sounds as hardware settles into position, and a competent crew will tell you what's normal versus what warrants a callback.