The first cold snap of the season is a test your garage door either passes or fails. What it reveals is the condition of things you probably haven't thought about since spring - seals that have dried and cracked over the summer, lubricant that evaporated off the hinges in July heat, a bottom seal that's been slowly losing contact with the threshold and nobody noticed because the weather was warm enough that it didn't matter.
Winter doesn't break garage doors. It reveals the ones that were already getting there.
The prep work isn't complicated and it doesn't take long. Most of it is an hour or two one Saturday in October, before the temperature makes working in the garage uncomfortable and before the problems that were building quietly all year start showing up as calls to a repair company in January.
Here's everything, in the order it makes sense to do it.
Start with the weatherstripping - all of it
The seals around your garage door are the first line of defense against cold air, water infiltration, and the freeze-to-the-threshold problem. They also fail more gradually than anything else on the door, which is why people miss it. The seal that was doing its job adequately last winter may be barely functional now - dried, cracked, compressed flat, or pulling away from the frame in sections.
Check the bottom seal first. Close the door and go inside the garage during daylight. Get low and look along the bottom edge. Any daylight coming through is cold air coming through in winter. Run your hand along it - you should feel consistent contact along the full width. If there are spots where the seal is clearly flat, rigid when you press it, or visibly cracked, it's ready for replacement. A bottom seal is $20 to $50 in materials and an afternoon of DIY work (see the weatherstripping guide elsewhere on this blog if you haven't done it before).
Then check the side seals running up the vertical door frame on each side. These press against the door panel edges when the door is closed. Same test - stand outside, look for light gaps along the sides. The failure mode here is gradual flattening over years of compression. A side seal that looks fine from three feet away may no longer be making meaningful contact.
The top seal across the header gets forgotten most consistently. Close the door from inside and look up along the top edge with a flashlight. Any gap there is a cold air entry point and a potential water infiltration path in heavy rain or blowing snow.
Whatever you find, address it now. Replacing a $35 perimeter seal kit in October is a different experience than trying to do it in February when the rubber is stiff from cold and your fingers are numb.
Lubricate - with the right product, in the right places
Cold weather changes the viscosity of lubricants. A thin film of the right product that was working adequately in the spring has either dried, evaporated, or thickened from summer heat and road dust exposure by October. Going into winter with dry hinges and rollers is starting behind.
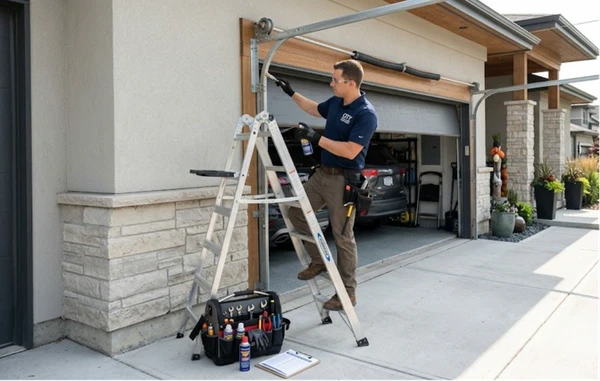
Silicone spray on the hinges, rollers, and springs. The hinge pins - the pivot point where each hinge articulates - need it more than the hinge body. The roller stems and bearing interfaces get a brief spray. Torsion springs get a sweeping coat along the full length of the coil.
White lithium grease on the opener rail and chain (if you have a chain-drive) or on the rail itself for belt and screw drive systems. Heavier grease stays in place better than silicone on the high-friction contact of the opener drive - useful in cold where metal-to-metal contact is more pronounced.
What to skip: WD-40. Not a lubricant in the durable sense - it evaporates, leaves residue, attracts grime, and leaves the surface drier a week later than before you applied it. Also skip: the tracks. Lubricant inside the track channel collects debris and creates drag. Tracks should be clean and dry.
One thing worth doing in fall specifically: lubricate the bottom seal itself with a light coat of silicone spray. It doesn't protect the door from freezing to the ground in extreme conditions, but it slows ice bonding on light freezes and extends the life of the rubber. The seal stays more pliable in cold when it has a surface treatment versus sitting dry all winter.
Test the balance - because cold will make an existing problem worse
Balance issues that are mild in warm weather become significant in cold. A door that's slightly spring-heavy or spring-light in October will strain the opener motor noticeably in January when the lubricant is stiffer, the metal is contracted, and everything in the system is working a little harder.
The test takes two minutes. Disconnect the opener by pulling the emergency release cord. Lift the door manually to about waist height and let go. A well-balanced door stays in place, drifting maybe an inch in either direction at most. A door that falls away from the open position has insufficient spring tension. A door that shoots upward has too much. Both mean the springs need adjustment before winter.
If adjustment is needed, schedule it before the temperature drops consistently below freezing. Spring adjustment involves winding or unwinding torsion spring tension - this is work that requires the right tools and the right training, and it's work that's done routinely by garage door technicians. It's not emergency work if you catch it in October. It can feel like emergency work if the spring fails on a February morning when the overnight low was 10°F.
Check the hardware - tighten what's loose
Everything on a garage door vibrates. Thousands of door cycles over a year mean that bracket bolts, hinge screws, and track fasteners work themselves loose gradually and continuously. Cold is when loose hardware causes problems, because metal contracts in cold and what was slightly loose in October can rattle noticeably by December.
Walk the door with a socket wrench and check every bracket bolt, every hinge screw, every track mounting bolt. Tighten anything that has play in it. This takes maybe twenty minutes and is the kind of maintenance that prevents the secondary damage that happens when loose hardware lets a component drift out of alignment.
While you're at it, look at the rollers - visible cracking on nylon rollers, rust on steel roller bearings, any wheel that wobbles on the stem. Replacing worn rollers before winter is easier than dealing with a roller failure when the door is frozen and you're already stressed.
Check cables while you're looking at hardware. The lift cables run from the bottom bracket up to the drum on the torsion spring shaft. Look for fraying, kinking, or any section that looks different from the rest. Frayed cables are a pre-failure condition - they can last weeks or months longer, or they can fail tomorrow. Replace frayed cables before winter.
The opener in cold weather - what changes and what to do
Electric motors don't love extreme cold. The lubricant inside the gearbox thickens, the motor works harder to move the same load, and response times slow slightly. None of this is usually dramatic on a door that's properly balanced and lubricated - but it's more pronounced on older openers, and it's significantly more pronounced on doors where everything is already working harder than it should because the balance or lubrication hasn't been addressed.
The opener's force settings are adjustable - the threshold at which the motor decides it's met resistance and stops. In warm weather these settings are often dialed back from their maximum, because a well-functioning door doesn't need maximum force. In winter, slightly increasing the force setting (on most openers this is a dial or screw adjustment on the motor unit labeled "down force" and "up force") helps the opener handle the increased resistance of cold, stiff lubricant and slightly contracted hardware.
Don't crank the force setting to maximum - the safety system needs headroom to detect a real obstruction. But moving it up a half-turn from wherever it is now is often the difference between an opener that struggles on cold mornings and one that operates without complaint.
Remote batteries deserve mention. Cold drains batteries faster than warm. If your remote is working at reduced range in October, new batteries will fix it briefly and then start degrading again by January. Fresh batteries going into winter is a thirty-second task that prevents the moment where you're standing in your driveway in the dark pressing the remote and nothing is happening.
The insulation question
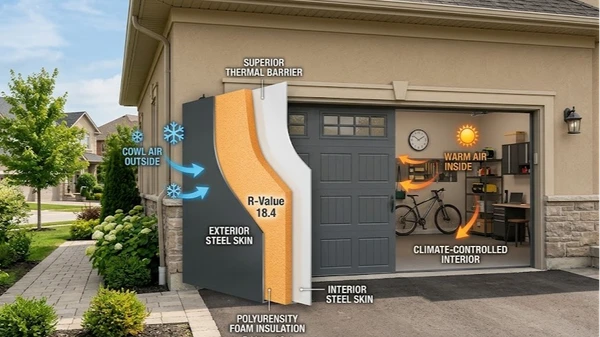
An insulated garage door keeps the garage meaningfully warmer than an uninsulated one - typically 10 to 12 degrees warmer in cold conditions. For an attached garage, that's 10 to 12 degrees less cold that the interior wall shared with your house is dealing with, which shows up in your heating bill over a full winter.
If you have an uninsulated door - thin single-layer steel with no foam or polystyrene fill - you have two options. Retrofit insulation kits, which are rigid polystyrene panels that fit into the door panel recesses from the inside, cost $50 to $100 for a single-car door and are a reasonable DIY project. They add meaningful R-value improvement, though not as much as a factory-insulated door.
The better long-term answer for a door that's already aging or undersized is replacement with a properly insulated door. The R-value conversation is worth having separately (there's a full guide on this blog), but the baseline is R-13 for attached garages in moderate climates and R-16 or better for cold-climate installations.
The quick checklist version
If you want to work from a list:
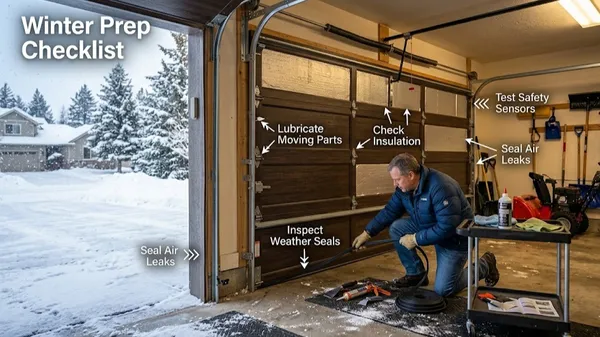
Inspect and replace bottom seal, side seals, and top seal if any are cracked, flat, or showing light gaps. Lubricate hinges, rollers, springs, and opener drive with silicone spray and lithium grease respectively. Test door balance - disconnect opener, lift to half height, let go - and have springs adjusted if the door doesn't hold position. Tighten all bracket bolts, hinge fasteners, and track mounting hardware. Check cables for fraying. Look at rollers for wear. Adjust opener force settings up slightly for winter resistance. Replace remote batteries. Apply silicone spray to the bottom seal surface. Clear any drainage issues at the threshold that cause water pooling.
That's an afternoon. Probably less if everything is in decent shape. The version that takes longer is the one where you discover in November that the rollers are worn, the spring balance is off, and the bottom seal needs replacement - all at once, with cold already here.
DoorFixy handles full winterization services - all of the above in a single visit, with a technician who can catch the problems you wouldn't find yourself.