Rust doesn't announce itself. One day you notice a small reddish-brown spot near the bottom of a panel, maybe near a corner where moisture tends to collect. It looks minor. It is minor - right now. Leave it six months and it isn't.
Steel garage doors rust from the outside in when the protective coating gets compromised. A rock chip, a dent that broke the paint, a scratch from a ladder or a bike - any of these creates a breach where moisture and oxygen reach the bare steel underneath. Once that starts, it spreads.
The good news is that early-stage rust on a steel door is genuinely fixable as a DIY job. Material cost is under $50. Time investment is an afternoon. What you need is to catch it before it penetrates through the panel - because at that point, the repair calculus changes entirely.
Diagnosing What You're Dealing With
Not all rust looks the same, and what stage it's at determines what you need to do.
Surface rust: Reddish-brown discoloration, possibly with slight texture, but the metal underneath is still solid. Press a fingernail into the affected area - the surface should feel firm, not soft or crumbly. This is the easy stage. Fixable with basic materials and an afternoon.
Moderate rust with pitting: Small depressions where the rust has eaten into the surface layer. Metal is still structurally intact but the surface has texture where it used to be smooth. Still repairable, but requires a filler step before repainting.
Deep rust / through-rust: The rust has eaten through the panel. You can see daylight, or pressing on the area causes it to flex or crumble. At this stage, the panel needs replacement. No amount of filler or paint fixes a panel that's structurally compromised - it looks okay for a few months and then the area around the filler continues rusting.
Probe any suspicious area by tapping gently with a screwdriver handle. A solid panel sounds different from a rusted-through one. If the area flexes, sounds hollow, or the screwdriver goes through with minimal pressure, the panel is done.
What You Need for Surface Rust Repair
- 80-grit sandpaper and 120-grit sandpaper
- Wire brush or wire wheel attachment for a drill
- Rust converter or rust-inhibiting primer (Rust-Oleum Rust Reformer works well)
- Exterior paint matched to your door color
- Clear topcoat or exterior enamel
- Painter's tape, drop cloth, tack cloth
Total materials: $30–$60 depending on what you already have.
Surface Rust Repair: Step by Step
Clean first. Wash the panel with soap and water, rinse, let it dry completely. Rust treatment applied over dirt or moisture doesn't adhere correctly.
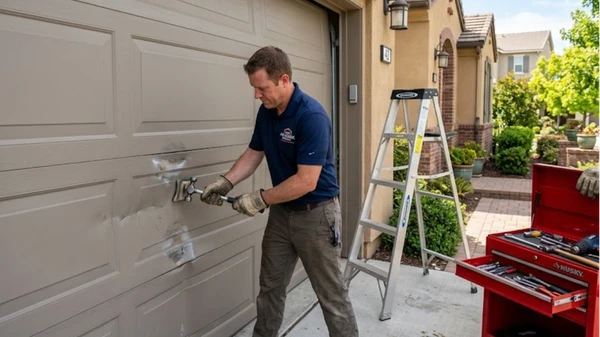
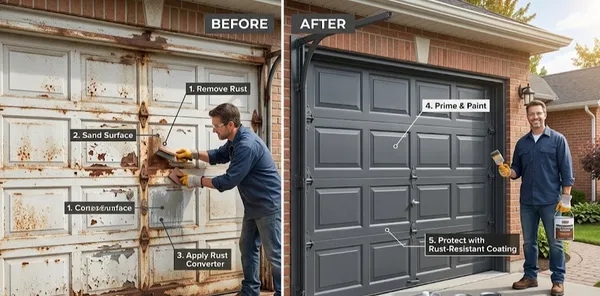
Sand to bare metal. Use the wire brush or 80-grit to remove all visible rust and any loose or flaking paint around the spot. Get back to clean, solid metal - don't stop when the rust color disappears, keep going until the surface feels smooth and uniform. Feather the paint edges around the repair so there's no sharp line between old paint and bare metal.
Switch to 120-grit and smooth the sanded area. This gives primer something to grip.
Apply rust converter or primer. Rust converter chemically reacts with any remaining rust and converts it to a stable compound that won't keep oxidizing. Let it cure fully before painting. Standard metal primer also works - two thin coats, letting each dry.
Paint. Two thin coats of matched exterior paint, letting each dry fully. Thin coats prevent runs and adhere better than one thick coat trying to do everything.
Topcoat. Exterior clear coat protects the repair and blends the sheen with the surrounding panel. Skip this step and the repaired area often looks slightly different in certain light - the color is right but the surface texture reads differently from the original factory finish.
Don't rush drying. Each coat needs full cure time. Most exterior latex paints need 2–4 hours between coats and 24 hours before fully hardened. Applying the next coat too early causes runs, lifting, and a repair that looks amateur from five feet.
Moderate Rust With Pitting: The Extra Step
After sanding and treating with rust converter, use metal-compatible body filler - Bondo or similar - to fill the pits. Apply with a plastic spreader, slightly overfilling. Let it cure fully.
Sand the filler flush with 120-grit, then 220-grit to smooth. Feather the edges where filler meets metal. Prime, paint, topcoat as above.
Done properly, a pitting repair is invisible from normal viewing distance. The filler step is what separates a repair that lasts from one that looks patchy within a season.
Prevention: Twenty Minutes a Year
This is where most homeowners could save themselves a repair every few years with almost no effort.
Annual inspection. Once a year - spring is natural, after winter's road salt and moisture - walk the door panel by panel and look for chips, scratches, or any spot where the coating is compromised. Find them early and they're a five-minute touch-up. Miss them and they're a two-hour repair.
Touch up chips immediately. Keep matched touch-up paint on hand. A chip the size of a pencil eraser takes two minutes to touch up before it rusts. Leave it a year and it's a much bigger job.
Wash the door. Road salt, fertilizers, and airborne pollutants accelerate corrosion when they sit on the surface. Soap and water two or three times a year - especially after winter - removes the chemistry that drives rust.
Bottom panels need the most attention. Water splashes up, debris hits them, the bottom edge sits close to the ground where moisture is constant. Rust almost always starts here. Inspect bottom panel edges and corners carefully every time you check.
Wax it. Car wax applied to a clean painted garage door creates a moisture barrier that meaningfully extends the coating's life. It washes off - reapply once or twice a year. Takes twenty minutes, costs nothing if you already have car wax sitting in the garage.
Coastal homes need more. Salt air accelerates corrosion aggressively. Standard paint and primer hold up in most climates - they don't hold up the same way within a few miles of the ocean. Look at marine-grade primers and topcoats for repaints, or factor in aluminum as a material for your next door.
When Rust Means Panel or Door Replacement
Through-rust on one panel: Replace that panel. The surrounding structure is fine, and $150–$500 for a panel replacement makes clear sense over a door that's otherwise sound.
Through-rust on multiple panels, especially the bottom row: This usually means moisture has been a persistent problem - poor drainage, a failed bottom seal letting water pool against the panels, or a weatherstripping gap directing runoff to the same spot repeatedly. Replace the panels after fixing the water source. Do it in the other order and the new panels rust too.
Through-rust plus a door that's 15+ years old: This is when replacement becomes worth considering. An aging door with structural rust in multiple spots isn't getting better with repairs, and each panel you replace is money spent on a door approaching the end of its useful life anyway.
DoorFixy handles panel replacement and full door assessments. Not sure if what you're seeing is surface rust or something more serious? We'll take a look and give you a straight answer. Reach out anytime.