Three years ago I went through a stretch where my garage door needed a service call twice in six months. Two separate issues - a worn roller and then a cable that had been fraying longer than I realized. Neither was catastrophic. Both were things that would have been caught if someone had looked at the door properly in the preceding year.
I hadn't looked at it at all. I just used it twice a day and assumed it would announce any problems loudly enough that I'd notice.
The roller didn't announce anything. It wore down gradually, started making a slightly different sound, and I adapted to the slightly different sound until the day it wedged in the track. The cable frayed silently and I found out the morning it had worn through enough that the door was running on one cable and sagging noticeably on the other side.
This guide is what I do now. Once a year, usually in April before the summer heat sets in. Takes about an hour. Catches most of what would otherwise surprise me later.
What the annual garage door maintenance checklist covers
A full annual garage door tune-up touches every mechanical and sealing component on the door system. The goal isn't to repair anything - it's to assess the current state of every component against a known standard, identify what's degrading, and address it before it fails.
The checklist divides into things you can do yourself and things that require a professional. That distinction matters because the self-service tasks are genuinely accessible for most homeowners, and the professional tasks involve spring tension and cable hardware under load - not a place to learn through trial and error.
The visual inspection: what to look for before you touch anything
Start with a slow walk around the door - inside and outside - before running it or touching any hardware. You're looking for things you wouldn't notice in daily use because daily use doesn't involve stopping to look.
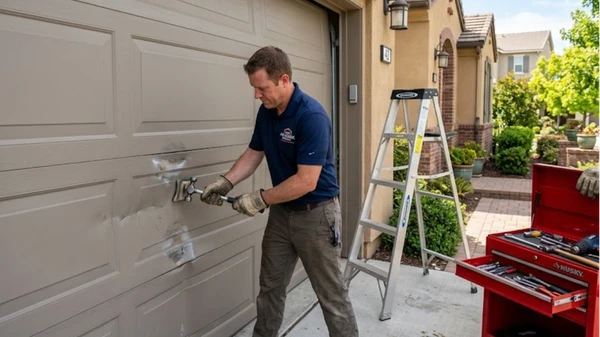
Panel condition: dents, rust spots, cracking paint, visible warping in steel or wood panels. Surface rust on painted steel doesn't indicate structural failure, but rust that has pitted the steel or is flaking off has eaten through the protective layer. Any panel that's warped noticeably - bowed out of plane relative to the ones next to it - is doing something thermally or structurally that warrants attention.
Hinge condition: each hinge should look flat and square. A hinge that's cracked at the fold line, or bent at an angle relative to the panel face, has been stressed beyond its normal operating range. Look specifically at the hinge pin - the metal rod running through the joint. Rust there means the pin isn't moving freely, which puts additional load on the motor every cycle.
Cable condition: the lift cables run from the bottom bracket on each side, up and around the drums on the torsion spring shaft. Stand at a distance and look at both cables. They should be parallel to each other, taut, and seated evenly in the cable drum grooves. Any visible fraying - individual wire strands separating from the main cable bundle - is a cable approaching failure. A cable that's off its drum and running at an angle is an immediate problem. Don't run the door.
Spring visual: look at the torsion spring (the horizontal coil above the door) for rust in the coil valleys, visible gaps between coils that shouldn't be there, or obvious deformation. If the spring has a gap in the coils where there wasn't one, the spring has broken. A broken torsion spring makes the door feel extremely heavy when you try to lift it manually.
Track condition: look along both vertical tracks for dents, bends, or sections where the track is pulling away from the mounting brackets. The track should be straight, plumb, and firmly attached at every bracket point.
Weatherstripping: check the bottom seal, both side seals, and the top seal. Any section that's visibly cracked, brittle, or compressed flat isn't sealing. The bottom seal should compress slightly when you press it and spring back - if it's rigid, it's at end of life regardless of how it looks.
This visual pass takes about fifteen minutes and is the part of garage door maintenance most people never do. It's also where most problems are first visible, weeks or months before they become failures.
The operational test: listening and watching the door run
After the visual inspection, run the door through three full cycles - up, down, up, down, up, down - while standing in different positions to watch different parts of the system.
Watch the door travel from the side: it should move parallel to both sides of the opening, not drift toward one track. Uneven travel indicates a balance or alignment issue.
Watch the rollers entering and exiting the curved radius section at the turn: they should roll smoothly without catching or hopping. A roller that jerks at the radius is either worn or the radius is slightly bent.
Listen for sounds that are specific to a position in the door's travel - a creak or click that happens at the same point every cycle. Position-specific sounds usually indicate a hinge, roller, or track issue at that location. General noise throughout the travel is usually a lubrication issue.
Watch the opener disengage at the fully-open and fully-closed positions: it should stop cleanly without slamming into the limits. If it's slamming or the motor struggles near the end of travel, the limit switches need adjustment or the door's balance has shifted.
Lubrication: the most impactful DIY maintenance task
Proper garage door lubrication is the single most effective thing a homeowner can do to extend the life of the system. It's also the task most people do incorrectly - wrong product, wrong places, or both.
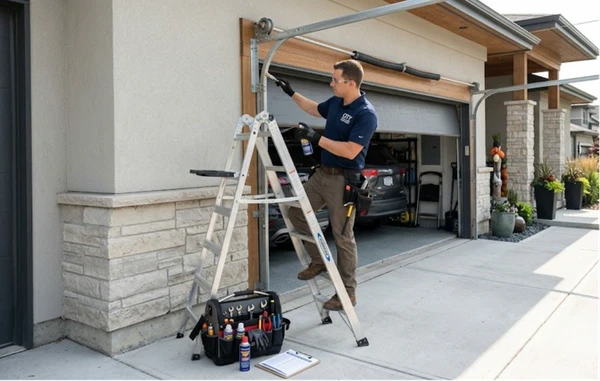
What to lubricate: hinge pins (the pivot point where each hinge articulates between panels), roller stems and the bearing interface at each roller, torsion springs along the full coil length, bearing plates at each end of the spring shaft, and the opener rail contact surface.
What not to lubricate: the tracks. Lubricant inside the track channel attracts dust and grit and builds up into drag-causing residue. Clean the tracks with a dry cloth. Leave them dry.
What product to use: silicone-based spray for hinges and rollers. White lithium grease spray for springs and the opener rail - heavier grease stays put under mechanical load better than silicone. Do not use WD-40, standard motor oil, or cooking spray. WD-40 is a water displacer, not a lasting lubricant - it evaporates and leaves the surface drier than before within a few days.
Apply each lubricant lightly. More is not better. A thin film that penetrates into bearing gaps and hinge joints is what you're after, not a dripping application that coats the door panels. After lubricating, run the door through two or three manual cycles before reconnecting the opener - this distributes the lubricant into the contact surfaces that direct spray couldn't reach.
Hardware tightening: takes ten minutes and prevents more problems than anything else
A garage door runs through more than a thousand cycles per year on average. Constant vibration works fasteners loose. A bolt that's solid in spring can be noticeably loose by fall, and a loose mounting bracket lets the track it's holding drift, which becomes an alignment problem, which becomes a noise and wear problem.
Go through every mounting bracket on the vertical and horizontal tracks with a socket wrench. Every lag bolt into the wall framing, every ceiling bracket anchor. Give it a firm test - if it turns even slightly, tighten it. If it turns but doesn't bite (the hole in the wood has been stripped), the bracket needs to move to a fresh anchor location.
Check hinge fasteners as well. The screws that hold hinges to the door's vertical stiles are self-tapping into sheet metal. Over time the holes can elongate. A hinge screw that spins without tightening needs either a slightly larger screw or a hinge position adjustment.
This task costs nothing and takes ten to fifteen minutes. It quietly prevents a category of alignment and tracking problems that seem mysterious until someone checks the brackets.
The balance test: how to know if your springs need professional adjustment
With the door in the closed position, pull the emergency release cord to disconnect the opener. Lift the door manually to about waist height and let go.
A door with properly tensioned springs holds that position - it may drift a few inches in either direction but shouldn't fall away from where you placed it or shoot upward on its own. If it falls noticeably downward, the springs have insufficient tension to counterbalance the door's weight. If it rises to the open position on its own, the springs are over-tensioned.
Either condition means the spring tension needs professional adjustment. This is not a DIY task. Spring adjustment requires specific winding bars, knowledge of the tension calculation for the door's weight and lift height, and a clear understanding of what happens when a spring under hundreds of pounds of stored energy is unwound incorrectly. The adjustment itself is a $100 to $150 professional service call. Not adjusting a spring that's out of calibration accelerates wear on the opener motor, the cables, and the rollers - the door is working against improper counterbalance on every cycle.
Safety sensor test: the check most homeowners never run
The garage door safety sensor test is simple and important. While the door is closing, roll a cardboard box into the beam path of the photo-eye sensors near the floor. The door should stop and reverse immediately.
If it doesn't, the safety system is not functioning correctly. Don't use the door until the sensors are repaired or replaced. This is the system that prevents the door from closing on a child, a pet, or a person - a sensor that's failed closed (reporting clear when it isn't) is the most dangerous single failure mode in a residential garage door system.
Also test the pressure reversal: place a 2x4 flat on the floor in the door's path. The door should contact it and reverse. If it grinds down against the board or takes several seconds to stop and reverse, the force setting needs adjustment.
What the professional annual tune-up covers that you can't
Professional garage door service handles the components where homeowner inspection is valuable but homeowner repair isn't safe. During an annual service call:
Springs are inspected under load and their tension is verified against the door's current weight. Any spring showing rust, fatigue, or tension drift gets adjusted or replaced before it fails.
Cables are inspected and replaced if fraying is present - cable replacement requires removing the cable from the drum, which involves partially relieving spring tension. Not DIY.
Bottom roller brackets are checked - these are under direct cable tension and aren't safely accessed without relieving the spring system first.
The opener's force settings and limit adjustments are tuned for current door performance - not just left where they were set at installation, which may no longer match the door's current spring tension and hardware condition.
A professional garage door annual tune-up costs $75 to $150 for most residential services. The return on that cost isn't just the service itself - it's catching the fraying cable or the cracking spring before it fails on a morning when you need to get somewhere.
When to do it
Once a year, in spring, is the standard recommendation and it works for most homeowners. Spring is after winter stress has accumulated on the hardware and before summer heat puts additional load on lubricants and rubber seals.
For doors that get heavy use - four or more cycles daily on average - twice a year is better. Once in spring, once in fall. For a garage that's someone's primary entrance to the house and sees six to ten cycles a day, every six months isn't excessive; the hardware is completing more than 2,000 cycles per year.
For detached storage garages that see light use, every two years is probably adequate.
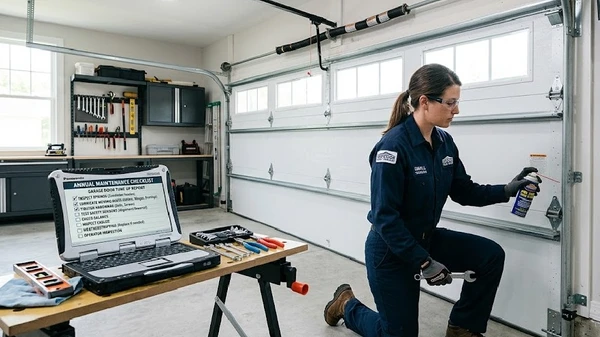
The quick reference checklist
Once a year in spring, work through this in order:
Inspect panels for rust, warping, and damage. Check hinges for cracks and rust at the pin. Inspect cables for fraying and correct drum seating. Look at the spring for rust and visible breaks. Inspect tracks for bends and confirm bracket attachment. Check all weatherstripping for cracks and rigidity. Run three operational cycles and listen/watch for anomalies. Lubricate hinges, rollers, springs, and opener rail with appropriate products. Tighten all mounting brackets and hinge fasteners. Test door balance by manual lift to waist height. Test safety sensors with a cardboard box. Test pressure reversal with a 2x4. Schedule a professional service call if the balance is off, cables show fraying, or anything in the spring or cable system looks wrong.
DoorFixy offers full annual garage door tune-up service - covering every item on this checklist, including the spring and cable components that need professional tools.
More on the DoorFixy blog - garage door maintenance guides, repair advice, seasonal checklists, and practical information for homeowners who want to understand their garage door system.